This No Bake Tiramisu Cheesecake tastes like classic tiramisu and rich New York cheesecake had a baby — and that baby is cooler than both of them! It’s a creamy, coffee-kissed dessert that blends the elegance of tiramisu with the richness of cheesecake, no oven required.

If you’ve ever wished you could mash together the dreamy layers of classic tiramisu with the luscious, tangy bite of cheesecake, this No Bake Tiramisu Cheesecake is basically that wish come true.
It’s the kind of dessert that looks fancy enough to make people assume you spent hours in the kitchen… when in reality your fridge did most of the work while you casually tasted the mascarpone filling “for quality control”.
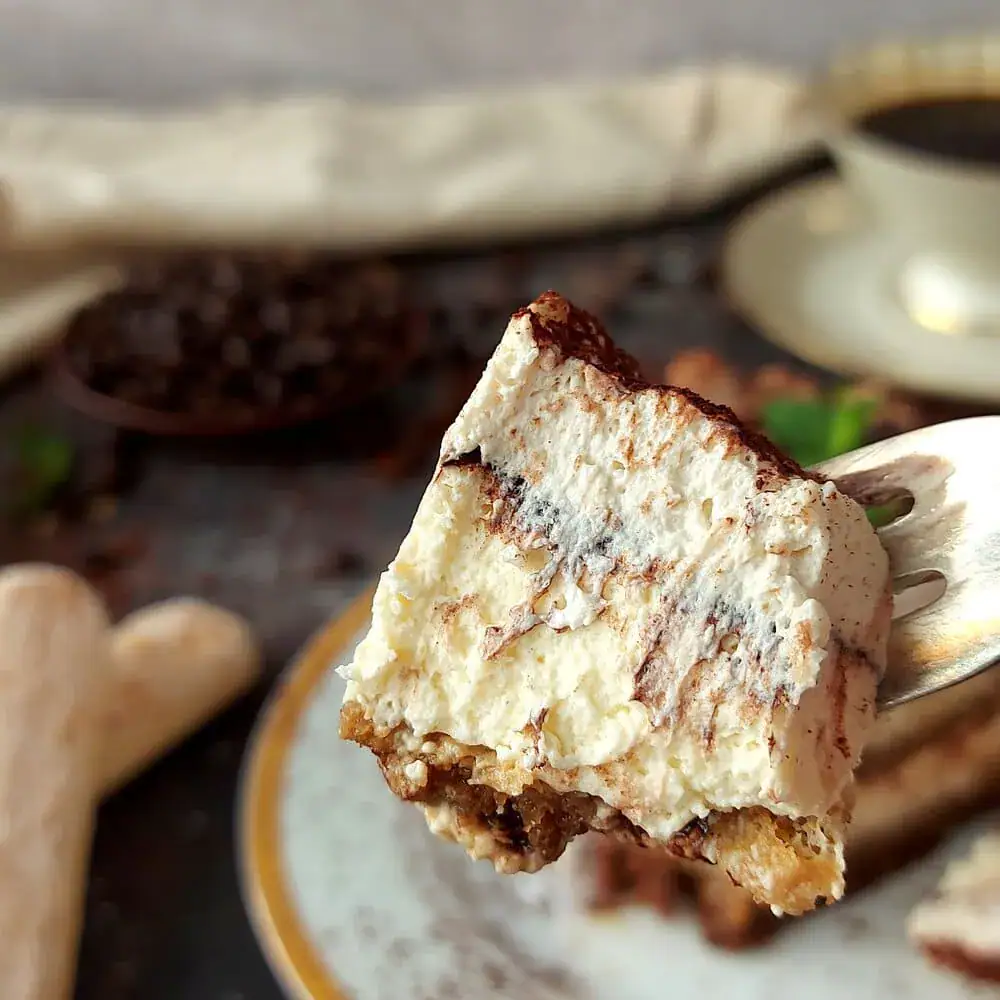
The texture is honestly kind of ridiculous. The combination of espresso-soaked lady fingers, cloud-like mascarpone cheesecake layer, and that dramatic dusting of cocoa powder on top is absolutely chef’s kiss. Silky and rich, yet somehow still light enough that you’ll go back for another slice even when you’re convinced you couldn’t possibly eat another bite. The espresso keeps it from being too sweet, the mascarpone keeps it luxurious, and the presentation makes you look like you went to pastry school. In reality? You just made a very good decision to make tiramisu and cheesecake fall in love.
I’ve been making this crazy delicious tiramisu cheesecake for years, and it never, ever disappoints. I’m obsessed, my family’s obsessed, and, trust me, you’re about to be too!

Why You’ll Love This No Bake Tiramisu Cheesecake
There are plenty of desserts out there, but this delicious tiramisu cheesecake hits that sweet spot between impressive and ridiculously easy. Here’s why:
No oven required – Seriously, this is huge. You don’t have to stress about water baths, right temperature ranges, or cracked tops. Just mix, layer, and chill. The fridge does all the work, while you do literally nothing. That’s my kind of baking!
It tastes expensive and complicated, but it’s neither – People will 100% think you spent hours on this. The truth? It’s just layering and patience. But they don’t need to know that. Let them think you’re fancy.
Absolute texture perfection – Creamy, silky, rich, with an almost mousse-like smoothness. Honestly, it’s the kind of texture that makes you close your eyes when you take a bite.
Make-ahead friendly – It sets perfectly overnight (or up to 3 days ahead), slices beautifully straight from the fridge, and it actually tastes better after chilling.
Stays perfect for days – Unlike some other desserts, this cake keeps beautifully in the fridge for up to 4-5 days – the texture stays creamy, and the layers stay perfectly intact.
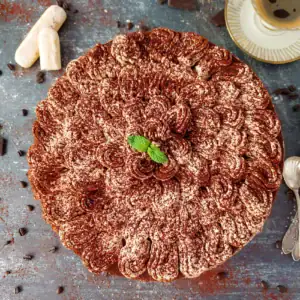
It looks absolutely stunning – That dusting of cocoa powder, the beautiful layer, and the contrast of cream and coffee-soaked cookies—it’s genuinely gorgeous and looks like a bakery masterpiece.
Ingredients for This No Bake Tiramisu Cheesecake

Graham cracker crumbs – These form the buttery crust that holds the cheesecake together and adds a lightly sweet crunch.
Butter – Melted butter binds the crumbs and helps the crust set firmly in the fridge.
Cream Cheese – Use full-fat cream cheese for the best texture. Let it soften at room temperature so it blends smoothly without lumps.
Mascarpone Cheese – This is what gives the cheesecake filling that classic tiramisu flavor and ultra-creamy texture. It’s rich, slightly sweet, and absolutely worth it.
Ladyfingers (Savoiardi) – These crisp Italian cookies soak up the espresso beautifully and create the signature tiramisu layers.
Strong Brewed Espresso or Coffee – The coffee flavor is what makes this dessert truly tiramisu-inspired. Use freshly brewed espresso if you can, but strong coffee works too.
Heavy Cream – Whipping cream lightens the cheesecake filling and keeps it silky instead of dense.
Sugar – Just enough to sweeten the filling without overpowering the coffee flavor.
Unsweetened Cocoa Powder – A generous dusting on top for a hint of chocolate bitterness and that signature look that makes tiramisu… well, tiramisu.
Vanilla extract – Adds a subtle warmth and enhances the flavor of the creamy filling.
Coffee liqueur or brandy – Optional but lovely if you want a slightly more grown-up version.
Equipment
electric hand mixer or stand mixer
shallow dish for dipping
fine mesh sieve or small swifter
offset spatula (optional)
piping bag (optional)
food processor
If you do not have a springform pan, you can use a regular 9×9 square pan lined with parchment paper with overhang on two sides. You will lose the circular tiramisu aesthetic, but you can lift the whole thing out and slice it into bars—still delicious, slightly more casual vibe.
No Bake Tiramisu Cheesecake at a Glance
(To make this recipe as easy as possible, I’ve included step-by-step photos. For the exact measurements, full printable recipe, and details, see the recipe card at the end of this post.)

Step 1 – Prepare the coffee
Brew about 2 cups of strong, bold coffee. Pour the coffee into a shallow bowl or dish and add the brandy/coffee liqueur if using, and sugar. Stir until the sugar dissolves. Taste it. It should be bold and slightly sweet, not bitter or harsh. Let it cool completely.
Step 2 – Make the crust
Combine graham cracker crumbs, melted butter, and sugar in a bowl. Mix until the texture looks like wet sand. Press firmly into the bottom of the springform pan using the bottom of a glass. Pop it in the fridge while you make the filling.

Step 3 – Beat the cream cheese and mascarpone
In a large mixing bowl, beat the softened cream cheese and mascarpone together until smooth and fluffy. Then add the sugar and vanilla and beat for another minute.

Step 4 – Whip the cream separately
In another bowl, whip the cold heavy cream to stiff peaks. Do not overbeat or you will get butter.

Step 5 – Fold the whipped cream into the cheesecake mixture
Add about a third of the whipped cream to the mascarpone mixture and stir it in gently to lighten the base. Then fold in the remaining whipped cream using a spatula. Try to keep as much air in the mixture as possible.

Step 6 – Dip the ladyfingers
One at a time, quickly dip each ladyfinger into the coffee mixture for no more than 1 to 2 seconds, or they will turn to mush. You want them softened but still holding their shape. Let the coffee drip first, then place them in a single layer over the crust, breaking pieces as needed to fill gaps.

Step 7 – Layer the filling
Spread half of the mascarpone mixture over the soaked ladyfingers, then dust generously with cocoa powder. Repeat the process with another layer of dipped ladyfingers, then top with the remaining filling. Smooth the top as neatly as you can.

Step 8 – Chill the tiramisu cake
Cover the pan tightly with plastic wrap and refrigerate for at least 6 hours, but overnight is better. The filling needs time to firm up, and the flavors need time to meld. Right before serving, remove the springform ring and dust with cocoa powder using a fine mesh sieve. Enjoy!

Tips for the Perfect No Bake Cheesecake Texture
Use room temperature cream cheese and mascarpone cheese
Cold cream cheese and mascarpone cheese will not blend smoothly and can leave little lumps in the filling. Let these cheeses sit at room temperature for an hour before you start. If you forget, you can microwave each block for 10 seconds, flip it, then microwave it for another 10 seconds. You want it soft to the touch but not melted.
Don’t over-soak the ladyfingers
The biggest rookie mistake is leaving them in the coffee too long, which can make the layers collapse. A quick dip is all you need as they will continue to absorb moisture as the dessert sits in the fridge.
Whip the cream to stiff peaks, not soft
Stiff peaks hold their structure and give you that perfect sliceable texture. When you lift the beaters, the cream should stand straight up without drooping.
Fold gently
When combining the whipped cream with the mascarpone mixture, fold gently to keep the filling airy. Overmixing can deflate the whipped cream and make the cheesecake heavier instead of airy and creamy.
Taste your coffee mixture
It should be strong but balanced. If it tastes too bitter on its own, it will taste too bitter in the dessert. Add another tablespoon of sugar if needed.
Chill it overnight if you can
This dessert really needs at least 6 hours in the fridge to set, but overnight is best. The longer it sits, the better the flavors meld and the cleaner your slices will be. This is the kind of dessert that actually improves on day two.
Don’t skip the cocoa dusting at the end
Cocoa powder is more than decoration—it balances the sweetness and gives the dessert that classic tiramisu finish. Dust it on just before serving for the prettiest look.
These small moves separate a cheesecake that holds its shape and tastes restaurant-quality from one that weeps liquid and collapses when you cut it.
Make-Ahead and Storage Tips
One of the best things about this no bake tiramisu cheesecake recipe is that it’s basically designed to be made ahead.
Make Ahead and Refrigerator Storage
You can prepare the cheesecake up to 24 hours in advance. Store it covered tightly in the springform pan or transfer it to an airtight container. It will keep in the refrigerator for up to 5 days. The flavors actually deepen over time, and the texture firms up beautifully and stays creamy and sliceable. Do not leave it out at room temperature for more than an hour or the filling will start to soften and lose its structure.
Freezing
If you need to freeze it, you can. Wrap the entire cheesecake tightly in plastic wrap, then again in aluminum foil. Freeze for up to 2 months. Thaw it overnight in the fridge, not on the counter. The texture may be slightly less fluffy after freezing, but it will still taste great. Dust with fresh cocoa powder after thawing to refresh the presentation.
Do not freeze individual slices unless you wrap each one separately. Otherwise, they will stick together, and the layers will get messy when you try to separate them.
Pro tip: If you’re making this for a party, or more than a day in advance, wait to dust the top until just before serving. You can store the cheesecake fully assembled, just without the final cocoa layer.

Serving Suggestions
This dessert is rich, so a little goes a long way. Slice it into narrow wedges, about 12 to 14 slices per cheesecake, depending on your crowd. Serve it cold, straight from the fridge.
For plating, keep it simple. A clean white plate, a dusting of extra cocoa powder on the plate itself, and maybe a few whole coffee beans scattered nearby for visual interest. If you want to go extra, add a small dollop of freshly whipped cream on the side or a single chocolate-covered espresso bean on top of each slice.
If you are serving this at a dinner party, slice it in the kitchen and plate it individually. It looks more polished than letting people hack into it at the table. If it is a casual gathering, you can bring the whole springform pan to the table, remove the ring in front of everyone for a little drama, then slice and serve from there.

Pairing Suggestions
Coffee-forward desserts love bold, complementary flavors.
For wine, go with a dessert wine that has enough sweetness and body to stand up to the richness. Vin Santo is traditional with tiramisu, while Moscato d’Asti is lighter and fruitier. If you want something fortified, try a tawny port or a cream sherry.
For cocktails, an espresso martini is the obvious move. You can also do a spiked affogato on the side, a scoop of vanilla gelato with a shot of hot espresso and a shot of Frangelico or amaretto poured over.
If you are keeping it non-alcoholic, serve it with a proper espresso or a strong cold brew. It balances the sweetness and cleanses your palate between bites.
For sides, you do not need much. If anything, serve it with fresh berries on the side, raspberries or strawberries, for a tart contrast. A small biscotti for dipping into coffee is a nice touch if you are doing a full Italian dessert spread.
The key is balancing richness with brightness, sweetness with bitterness, so every component on the table makes the others taste better.

Variations & Swaps
Make it boozy: You can spike the coffee soak with more liqueur, up to a quarter cup, for a more adult version.
Make it chocolate: Swap the graham cracker crust for crushed Oreos. Add 2 tablespoons of cocoa powder to the filling. Use chocolate shavings instead of cocoa dust on top. You will end up with a mocha cheesecake.
Make it lighter: Replace half of the cream cheese with Greek yogurt. The tang will be more pronounced and the texture will be slightly less dense. You can also use Neufchatel cheese, which is a lower-fat cream cheese that still whips up nicely.
Make it gluten-free: Use gluten-free graham crackers or crushed gluten-free cookies for the crust. Swap the ladyfingers for gluten-free sponge cake cut into strips. The texture will be slightly different but still delicious.
Make it individual: Skip the springform pan and build individual servings in small glasses or jars. Layer crust, filling, soaked ladyfinger pieces, more filling, and top with cocoa. You lose the dramatic slice reveal, but you gain easy portability and portion control.

Frequently Asked Questions
Do I need espresso for tiramisu cheesecake?
Not necessarily. Strong brewed coffee works perfectly well. If you want a deeper coffee flavor, you can stir a little espresso powder into the coffee.
Can I make this tiramisu cheesecake ahead of time?
Yes! In fact, it’s even better when made ahead. Prepare it up to 24 hours in advance so the flavors have time to develop and the cheesecake sets nicely.
How long does no bake tiramisu cheesecake last in the fridge?
Stored covered in the refrigerator, it will keep well for up to 5 days.
Can I freeze tiramisu cheesecake?
Yes. You can freeze the whole cheesecake or individual slices for up to 2 months. Wrap them tightly and thaw overnight in the refrigerator before serving.
Can I make this dessert without ladyfingers?
If you can’t find ladyfingers, you can substitute sponge cake, vanilla wafers, or even graham crackers. The texture will be slightly different but still delicious.
Why didn’t my no bake cheesecake set properly?
The most common reasons are under-whipped cream, warm coffee, or not enough chilling time. Make sure the cream is whipped to stiff peaks, the coffee is completely cold, and allow the cheesecake plenty of time to firm up in the fridge.

This No Bake Tiramisu Cheesecake has earned its spot as one of my most trusted dessert go-tos because it’s impressively elegant, effortlessly creamy, and versatile enough for any occasion. It captures that luxurious tiramisu essence with cheesecake’s perfect structure—all without the oven hassle or stress. Once you taste that coffee-mascarpone magic, it might just become your signature sweet treat for celebrations and quiet nights alike!
If this No Bake Tiramisu Cheesecake added a little joy to your table, I’d love for you to save it for your next gathering and share your personal twist in the comments — I love seeing my recipes come to life in your kitchen. Reviews are always appreciated too; knowing you enjoyed it makes my day. Thanks a ton for cooking along with me!
Other recipes you may like
- Cranberry Apple Stuffed Pork Loin (Festive & Refined)
- What to Put on a Charcuterie Board (Tips and Tricks)
- Sinfully Easy 3 Ingredient Peach Cobbler
No Bake Tiramisu Cheesecake People Go Crazy For!
Ingredients
COOKIE CRUST
- 2.5 cups (250 g) digestive biscuits crackers (roughly 36 biscuits)
- 2 TBSP unsweetened cocoa powder
- ½ cup melted butter
- 1 TBSP brown sugar
MASCARPONE MIXTURE
- 28 oz (800 g) cream cheese
- 7 oz (200 g) mascarpone cheese
- 36 ladyfingers (Savoiardi)
- ½ cup sugar
- 2 TB brewed coffee (cold)
- 2 tsp vanilla
- 3 TBSP unsweetened cocoa powder
WHIPPING CREAM (for the filling)
- 1 cup (240 ml) heavy whipping cream
- ¼ cup sugar
- 1 tsp vanilla
COFFEE MIXTURE FOR LADYFINGERS
- 2 cups strong espresso or brewed coffee
- ¼ cup sugar
- 2 TBSP brandy (Kahlúa or Amaretto)
- 1 tsp vanilla
COFFEE WHIPPING CREAM (for decorating)
- 1 cup (240 ml) heavy whipping cream
- 2 TBSP brandy (Kahlúa or Amaretto)
- 2 TBSP coffee
- 3 TBSP powdered sugar
- 1 tsp vanilla
GARNISH
- cocoa powder for dusting
- coffee beans (optional)
- mint leaves (optional)
- chocolate shavings (optional)
Instructions
MAKE THE COFFEE
- Start by brewing a strong espresso or coffee. Pour it into a shallow bowl for dipping the ladyfingers, then stir in the sugar, brandy, and vanilla. Mix until the sugar fully disoves. Set aside and let it cool while you prepare the cheesecake filling.
MAKE THE CRUST
- Melt the butter in a small saucepan and set it aside. Blitz the biscuits in a food processor into fine crumbs, then mix in the melted butter until it looks like wet sand. Tip the mixture into a 9-inch springform pan and press it down evenly using the bottom of a glass. Pop it in the fridge while you prepare the cheesecake filling.
MAKE THE FILLING
- In a large mixing bowl, add the softened mascarpone and cream cheese. Using an electric mixer (with a paddle attachment if using a stand mixer), beat on medium speed for 2–3 minutes until completely smooth and lump-free. Be careful not to overmix, as the mixture can become too soft. Add the sugar and vanilla, then beat for another minute until fully incorporated. The mixture should be smooth, thick, and slightly glossy. (Taste the filling and see if you’d like it sweeter. I personally love the tang of the cream cheese, but if you prefer a sweeter filling, stir in an extra ¼–½ cup sugar at this point.)
- In a separate bowl, whip the cold heavy cream to soft peaks. Add the sugar and vanilla, then continue whipping until stiff peaks form. Be careful not to overwhip, or it may turn grainy.
- Add about one-third of the whipped cream to the mascarpone mixture and mix gently to loosen it. Then add the remaining whipped cream and fold it in with a spatula, keeping the mixture light and airy. Fold just until fully combined and no streaks remain. The finished filling should be thick, fluffy, and well aerated.
SOAK THE LADYFINGERS
- Quickly dip the ladyfingers, one at a time, into the coffee mixture for about 1–2 seconds. Do not soak them longer, or they will become too soft. Let any excess coffee drip off, then arrange them over the biscuit crust, gently pressing them together to form an even layer. Break a few ladyfingers as needed to fill in any gaps.
LAYER THE MASCARPONE MIXTURE
- Spread half of the mascarpone mixture over the coffee-soaked ladyfingers, smoothing it into an even layer with an offset spatula. Dust generously with cocoa powder. Add another layer of dipped ladyfingers, then top with the remaining mascarpone filling. Smooth the surface evenly.
CHILL OVERNIGHT
- Cover the pan tightly with plastic wrap and refrigerate for at least 6 hours, preferably overnight. This allows the cheesecake to fully set and the flavors to develop. Cutting into it too early may cause the layers to collapse and the texture to be too soft.Tip: Add a few toothpicks on top before wrapping so the plastic wrap doesn’t cling to the filling—you worked hard for that smooth, pretty layer.
DECORATE WITH WHIPPING CREAM
- When ready to serve, run a knife around the inside edge of the pan to release the cheesecake from the springform.Whip the cold heavy cream until soft peaks form, then add the sugar and vanilla and whip just until the sugar is incorporated. Gently fold in the coffee and brandy, and continue whipping until stiff peaks form — be careful not to overwhip, or the cream may become grainy. You can use a piping bag fitted with a star tip to decorate, or simply spread the coffee whipped cream on top and use the back of a spoon to create flowing, decorative patterns.
DUST WITH COCOA BEFORE SERVING
- Dust the top evenly with cocoa powder using a fine mesh sieve. For clean slices, wipe the knife between each cut. Enjoy!

Leave a Reply